This is not just another how-to blog. The version you’re reading now is the result of years of customer feedback, internal testing, and several major revisions. What you see here is our most up-to-date guide for 2025, and we’ll continue to improve it through real-world experience and evolving FAQs. So, if you’re here to get it right, you’re in the right place.
1. Prep and Mindset
Putting on a chastity cage might sound simple enough: slide your balls through the ring, guide your shaft into the cage, and lock it up. For most people, as long as the sizing is right, it really is that easy. Whether you’re standing, sitting, or squatting, you’ll likely have it on in just a few minutes.
But things get trickier when your balls are naturally tighter, or when you’re exploring smaller, snugger designs, or pushing limits with more extreme styles like micro, flat, or even inverted cages. In those cases, the way you put it on matters a lot more. The right method can mean the difference between a smooth fit and a frustrating experience. It also affects how secure, safe, and wearable your cage will feel in the hours, or even days, ahead.
Before You Begin: Checklist & Preparation
To make your wear experience smooth and safe, here are a few things we recommend checking before you put on any cage:
1.1 Inspect the cage itself
This is one of the easiest steps to skip, especially if you’ve been using the same cage for a while. You might think, “I’ve worn it so many times already, why would I need to check it again?”
But chastity cages are wear-and-tear items. They’re constantly rubbing against your skin, resisting your erections, and under daily tension. Over time, even a familiar cage can develop small cracks, sharp edges, or structural flaws. So it’s always worth a quick look before you put it on.
If you’re trying a new cage, this step is even more important. We strongly recommend buying from responsible sources, because flaws can sometimes hide in the least visible spots, such as tiny burrs inside a vent hole, or residue tucked away in a seam.
All chastity cages sold through CageChastity go through multiple rounds of manual inspection at every stage, including design, manufacturing, warehousing, and packing. We’re proud to say we’ve never received a single report of sharp edges or surface flaws. Still, we encourage you to check again before wearing, just to be absolutely safe.
1.2 Test the lock
Try locking and unlocking your cage a few times before wearing it. Make sure the locking mechanism is smooth and consistent. If anything feels off, especially when unlocking, stop immediately and don’t attempt to wear it.
1.3 Groom carefully
We highly recommend shaving the area around the base of the shaft, especially where it connects to the body. This helps prevent stray hairs from getting painfully tugged or caught in slots or edges during wear. One unlucky hair can ruin your whole day.
1.4 Apply lubricant (optional)
A little lube can make a big difference, especially if you’re new to chastity or trying a tighter-fitting cage. We recommend using a clear, water-based lubricant to lightly coat the shaft, balls, and surrounding skin. It helps reduce friction during insertion and prevents pinching in sensitive areas like the base or glans.
Avoid oil-based lubricants, including Vaseline (petroleum jelly). While it might seem like a convenient option, it’s not designed for enclosed or long-term wear. Oil-based products are difficult to clean, can clog vent holes or urine exits, and may damage materials like silicone, resin, or coated metals.
Stick to water-based lubes. They’re safer for both your body and your device.
1.5 Choose the right position
We always recommend putting on the cage while standing, or at the very least, in a position where your balls and shaft are naturally hanging down. Most chastity cages are designed for the natural angle your body holds when standing, so that’s the best way to start.
2. Wearing Sequence, Techniques & Common Mistakes
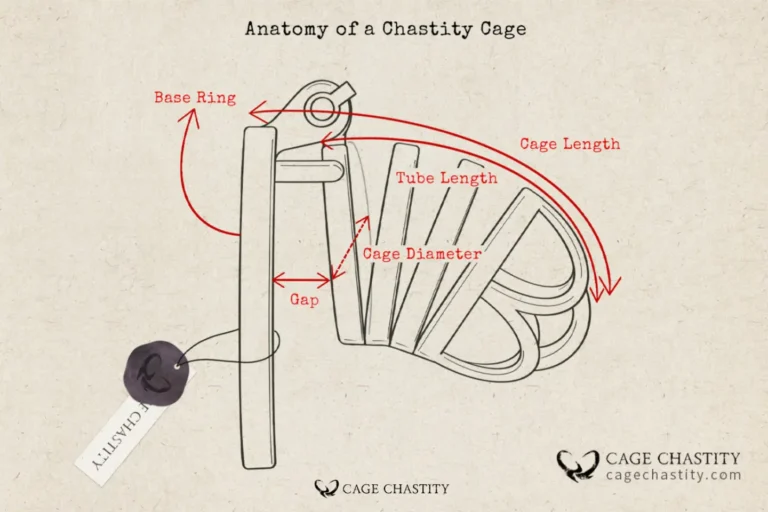
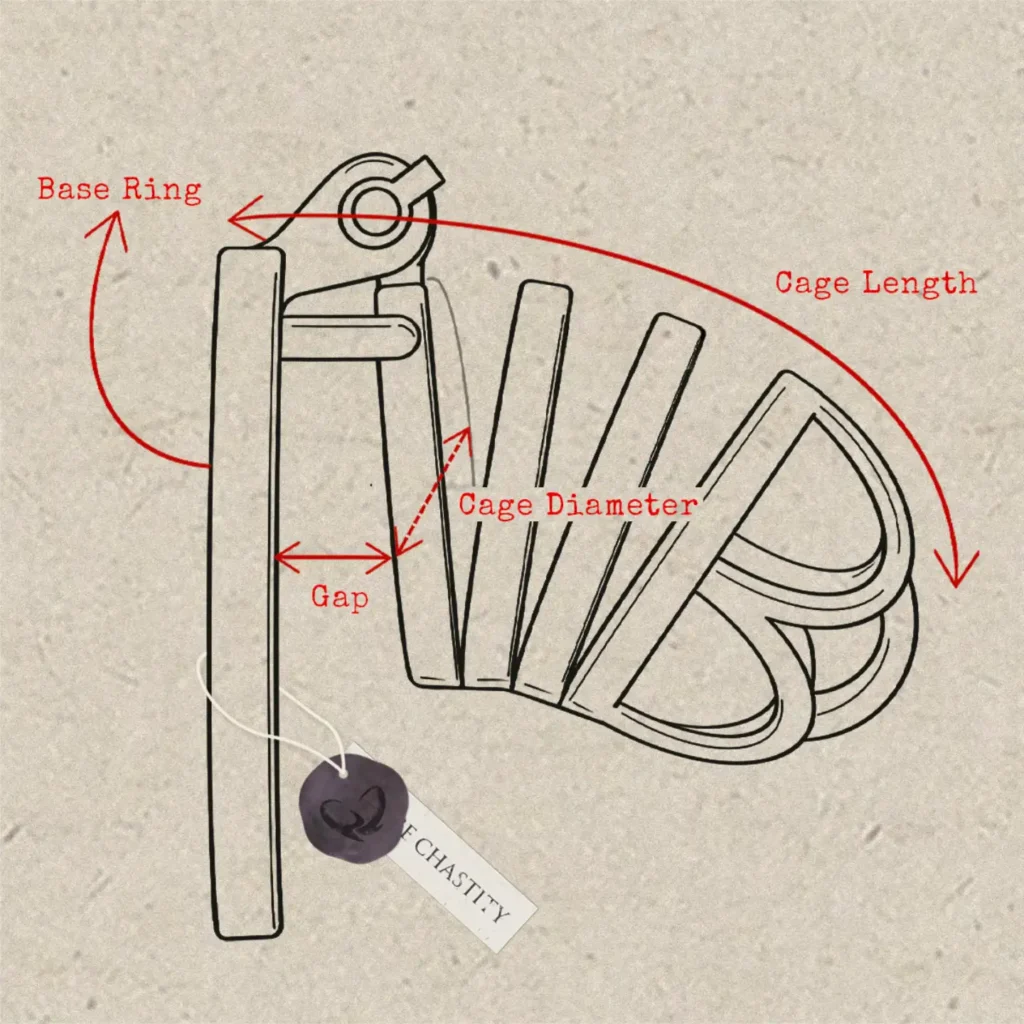
A typical chastity cage consists of two main parts: the base ring and the cage tube. Some designs may also include additional components like a sounding tube, silicone catheter, or U-cap. But no matter the style, the basic wearing sequence is mostly the same.
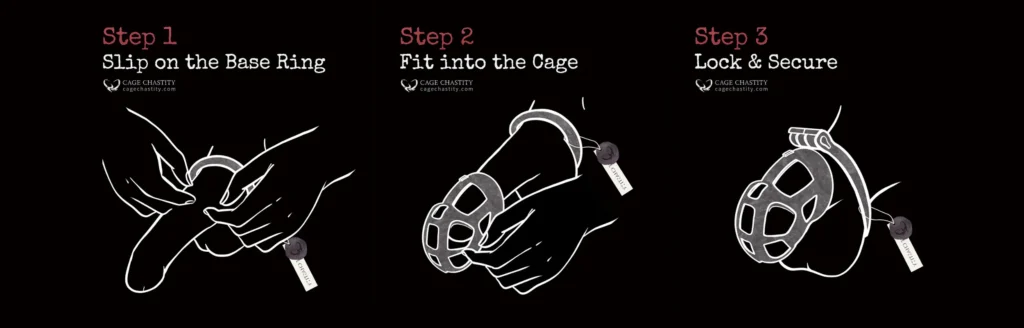
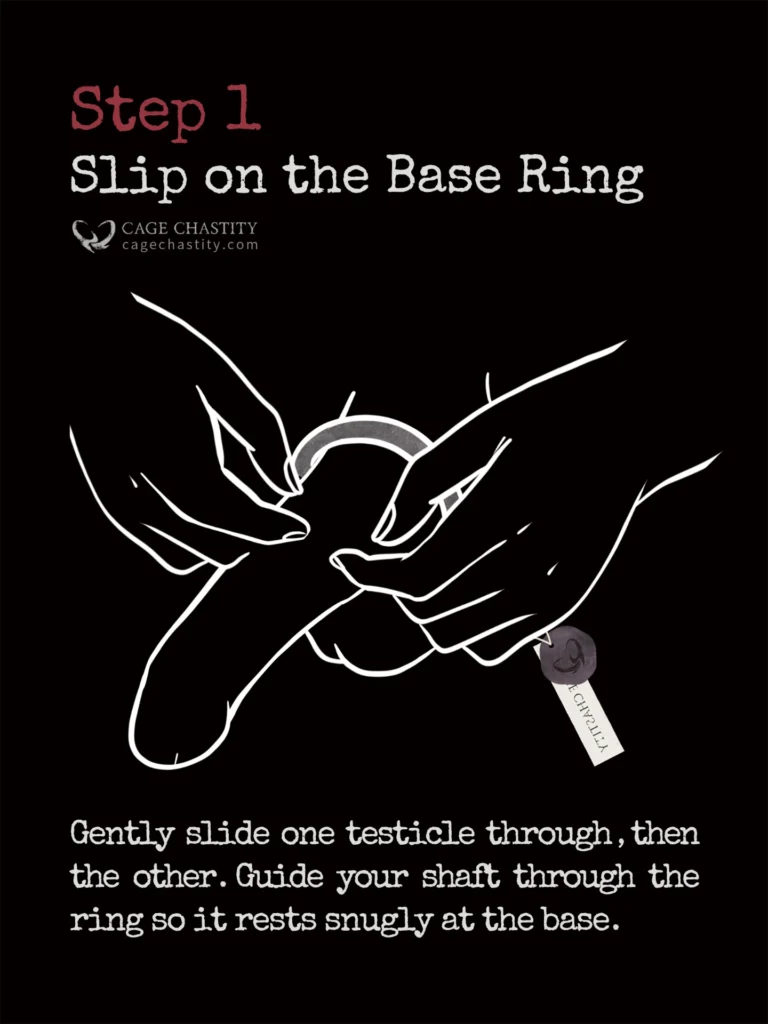
2.1 Put on the base ring
Start by sliding the base ring from back to front, making sure both testicles pass through the opening. It’s generally recommended to insert the testicles first, followed by the shaft. This order is safer and more comfortable, as the testicles are more sensitive and less compressible. (We go into more detail on this in the anatomy section of our size guide.)
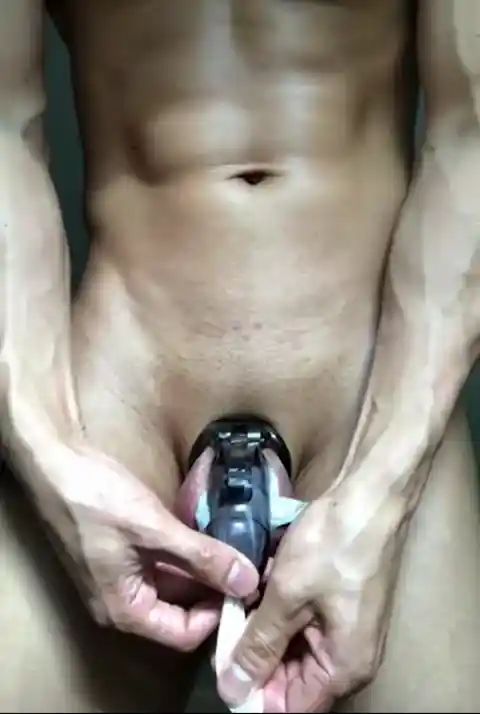
2.2 Insert the shaft / Stocking Method
Once the ring is in place, gently guide your shaft, ideally fully flaccid, into the cage tube.

If you’re using a tighter cage, try the stocking method, though we actually recommend using a thin plastic bag instead. Just place the plastic bag inside the cage, insert your shaft into it, then gently pull the bag forward through the cage tip opening. The motion draws your shaft into place, helping you align everything smoothly without pinching. (See below for a visual walkthrough, swipe to view)


It’s a trick people use to slide into tight leggings or latex outfits—wrap, slide, remove. Same logic, different body part.
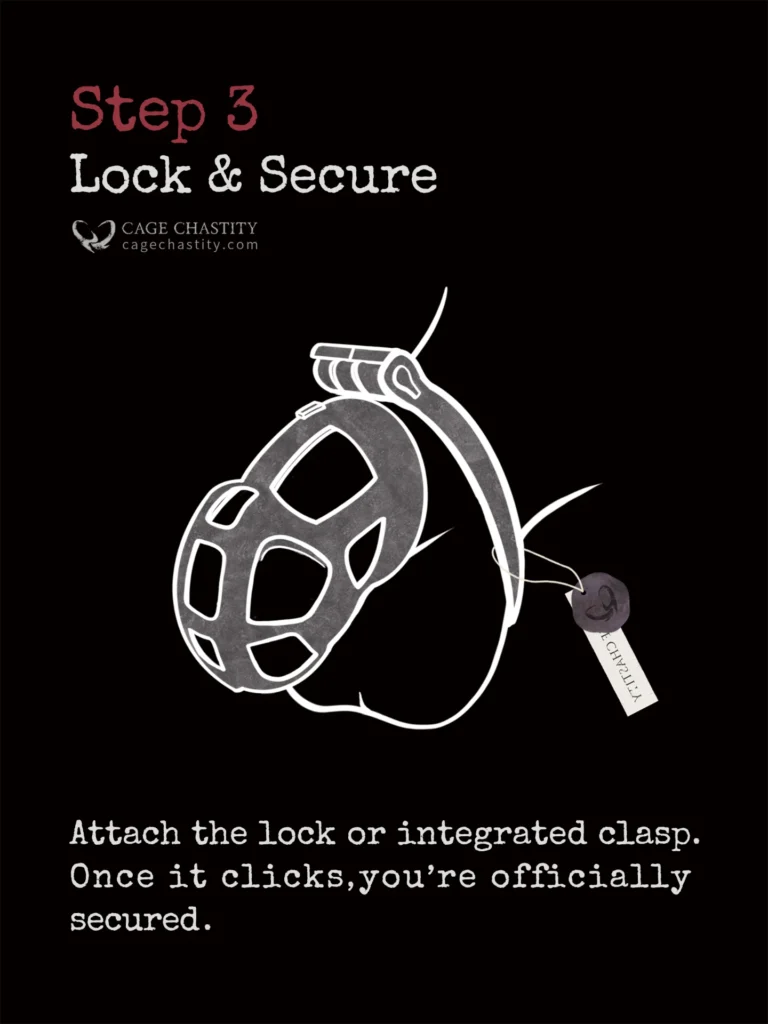
2.3 Secure with lock
Once the cage tube and base ring are properly aligned, insert the connecting pin or lock. If your device uses an internal locking system, make sure the holes are aligned before inserting the key as forcing it in could jam the lock.
Pro Tips
- Stocking Method Add-ons
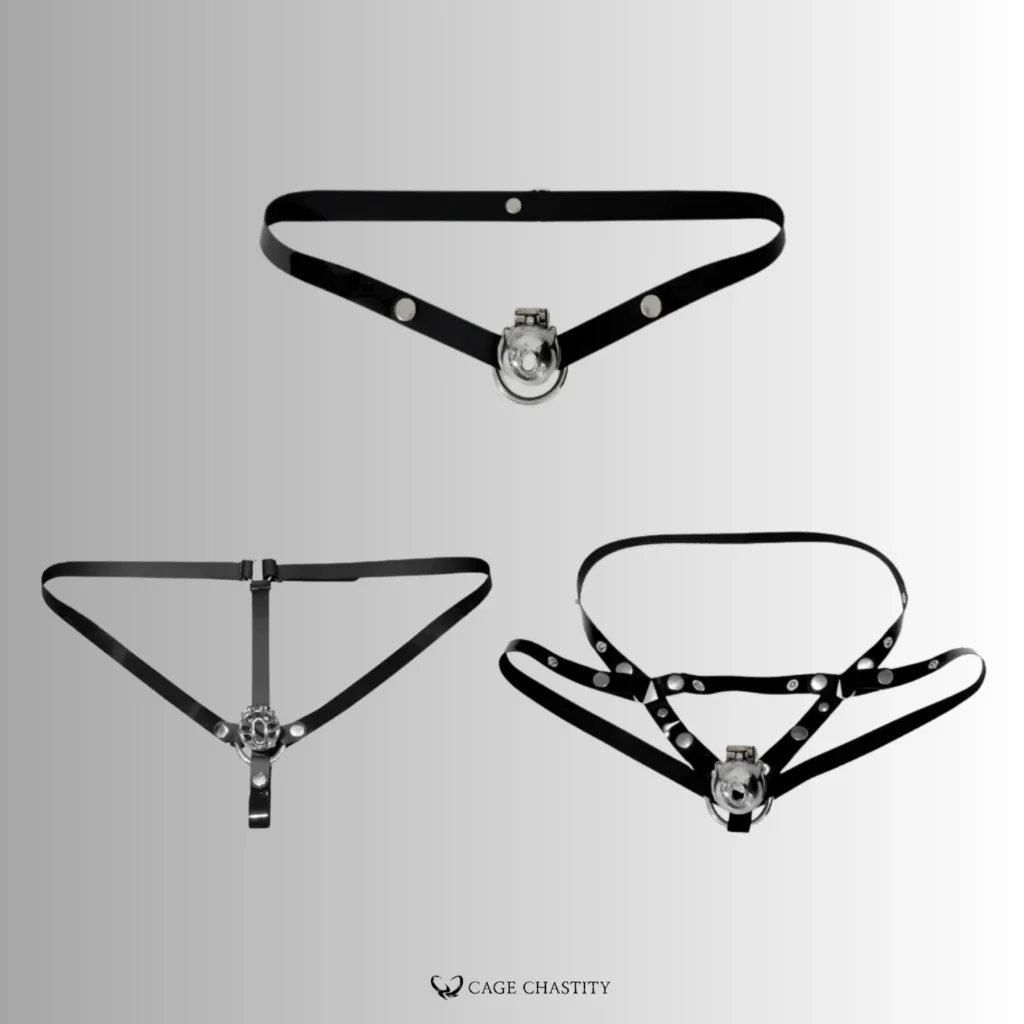
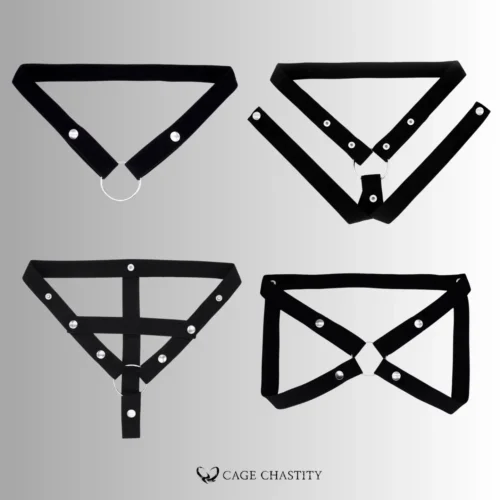
If you don’t have plastic wrap on hand, a plastic shower cap or a torn supermarket plastic bag might work just as well. Both can help guide your shaft through the cage more easily. - Support straps
If you notice the cage tends to slide forward or rotate during wear, consider using a chastity strap to stabilize the connection between the cage and the base ring. We offer a wide range of materials, styles, and colors to match your setup. Among them, our silicone chastity strap is the most popular option—fully waterproof, soft to the touch, and designed to hug your body with just the right amount of tension. They’re the only straps on the market that adapt precisely to your build for a truly custom fit. It’s the one we recommend most often, and our customers love it. - Separate your keys
Most locks come with two identical keys. Always store them separately to avoid being completely locked out in case one is lost. Having a backup key in a different location is a simple but essential precaution.
3. Ongoing Maintenance
Maintenance is something that rarely gets discussed, but it’s actually an important part of owning a chastity cage, especially if you’re wearing regularly or rotating between multiple devices.
Remember two key things:
- First, chastity cages are subject to wear and tear.
- Second, they need basic upkeep to stay safe, clean, and comfortable over time.
3.1 Cleaning
If you plan to store a cage for a while, we recommend giving it a proper clean, just like you would with dishes after use. Leaving behind sweat, skin oils, or urine residue can lead to odor, staining, or material breakdown.
- Resin cages
Resin has a smooth surface but can trap residue in vent holes, lock slots, or around seams. Use warm water and a mild, non-alcohol-based cleanser (like hand soap) along with a soft cotton cloth or cotton swab to clean every part thoroughly. Avoid hot water or harsh cleaners, which can deform or cloud the material. After washing, pat dry with a towel and allow the cage to air dry completely before storing—especially in tight corners or around the lock. - Metal cages
Stainless steel or coated metal cages can be washed using warm water and gentle detergent. A soft toothbrush works well for tight areas. Be sure to rinse and dry thoroughly, especially around the locking pin and any screw threads. If you’re using a brass lock, you may want to add a drop of machine oil in the keyhole occasionally to keep the mechanism smooth.
3.2 Storage
After cleaning and drying, always store your cage in a cool, dry place—away from moisture, heat, or direct sunlight. For extra protection, we recommend using a chastity bag.
This is especially true for silicone and lighter-colored resin cages, which tend to discolor more easily over time.
*If your order is $39.9 USD or above, you can add one of our exclusive chastity bags for just $1.99.
3.3 Wear & Tear
Like any gear that’s worn close to the body, chastity cages will naturally experience signs of wear over time, especially around connection points like the peg and lock insert.
If you notice looseness, noise, or a poor fit due to minor gaps forming, there’s a simple fix:
Use a silicone O-ring to add extra tension around the peg or locking pin. This acts as a soft spacer that reduces rattle, improves stability, and even helps dampen metal-on-metal sounds. You can find O-rings easily at hardware stores. Just look for soft silicone types with an inner diameter slightly smaller than your cage’s connector size.
4. Common Questions & How to Handle Them
4.1 My testicles won’t go through the ring—what should I do?
This is one of the most common issues. Testicles aren’t perfectly round, and they’re often slightly uneven in size. When putting on the base ring, start by inserting one testicle, then gently stretch the scrotal skin to slide the second one through. If your body is cold, your testicles may retract upward. Don’t force anything—warm up your scrotum a bit, and try again when it’s more relaxed.
4.2 I keep getting hard—how can I even put it on?
Try calming down with cold water or simply wait for the erection to fade naturally. New users should never force the cage on. While the penis is generally more resilient than it looks, it’s always better to be careful. As you gain experience, you’ll get a better feel for when and how to put it on safely.
4.3 It feels too tight after I put it on—did I get the wrong size?
A bit of pressure is normal right after locking up. But if you still feel numbness, throbbing pain, or see color changes after 10 minutes, take it off immediately. We suggest starting with a slightly more forgiving size if you’re new, then gradually working your way down as your body adjusts. For a full guide on sizing, we highly recommend checking our dedicated article about how to measure and choose your own cage.
4.4 The cage keeps slipping or shifting—how do I fix that?
This usually means the base ring is too big, or the cage and ring aren’t connecting snugly. Try going one size smaller on the ring, or use a chastity strap to stabilize everything. Wearing snug-fitting underwear also helps keep things in place.
4.5 It feels awkward to walk or sit—is that normal?
Yes, especially with longer cage tubes or stiffer materials like metal. Stick to snug underwear to reduce bounce, and go slow when squatting or sitting. Most people naturally adjust after a few days.
4.6 I’m stuck—it won’t come off!
First, stay calm. Most cages can still be removed even without unlocking, as long as you apply some lubrication and take your time. While unlocking is usually required to put the cage on, removing it in an emergency is often possible with a little patience.
Start by checking whether the lock is jammed. In many cases, the core just needs a slight wiggle, or the pin might not be fully aligned. Try gentle movement rather than forcing it.
Next, check if any skin is caught or pinched, especially around the base ring or lock area. Pulling too hard can make things worse, so avoid yanking the cage off.
If your penis is erect or semi-erect, wait until it softens completely. Then apply some water-based lubricant and try slowly guiding the testicles back through the base ring. It may feel tight, but with a relaxed body and careful movement, it’s usually manageable.
If you experience serious swelling, sharp pain, or any unusual discoloration, stop immediately. Forcing it off could cause harm. In this situation, the best course of action is to seek medical help.
4.7 Is there a special way to wear inverted or flat cages?
Not really. You still start with the base ring, then fit the cage tube. The only difference is the tighter design, so take extra care when guiding yourself in. Go slow, especially with these more compact styles.
4.8 Flat ring vs. arc ring—which one should I choose?
Most beginners start with a flat ring, especially on resin cages. On metal models, the difference becomes more noticeable—arc rings are slightly thicker, which creates a tighter, more compressed feel. Both styles have their own appeal, and we encourage you to experiment and see which pairing feels right for you.